ESP32 Data to Google Sheet 2024

สร้าง Google sheet ขึ้น คัดลอก Google Sheet ID

https://docs.google.com/spreadsheets/d/XXXXX Google Sheet ID XXXXX/edit#gid=0

เก็บไว้ 

เลือก ส่วนขยาย (Extension)

Apps Script

จะมีไฟล์ชื่อ รหัส.gs หรือ code.gs คัดลอกไฟล์ต่อไปนี้ลงไป


					function doGet(e) { 
Logger.log( JSON.stringify(e) );
var result = 'Ok';
if (e.parameter == 'undefined') {
result = 'No Parameters';
}
else {
var sheet_id = 'Google Sheet id'; // Spreadsheet ID
var sheet = SpreadsheetApp.openById(sheet_id).getActiveSheet();
var newRow = sheet.getLastRow() + 1; 
var rowData = [];
var Curr_Date = new Date();
rowData[0] = Curr_Date; // Date in column A
var Curr_Time = Utilities.formatDate(Curr_Date, "Asia/Bangkok", 'HH:mm:ss');
rowData[1] = Curr_Time; // Time in column B
for (var param in e.parameter) {
Logger.log('In for loop, param=' + param);
var value = stripQuotes(e.parameter[param]);
Logger.log(param + ':' + e.parameter[param]);
switch (param) {

case 'press1':
rowData[2] = value; 
result = 'OK'; 
break;

case 'temp1':
rowData[3] = value; 
result += ', OK'; 
break; 

case 'deep1':
rowData[4] = value; 
result += ', OK'; 
break;

case 'alti1':
rowData[5] = value; 
result += ', OK'; 
break;  

case 'press2':
rowData[6] = value; 
result = 'OK'; 
break;

case 'temp2':
rowData[7] = value; 
result += ', OK'; 
break; 

case 'deep2':
rowData[8] = value; 
result += ', OK'; 
break;

case 'alti2':
rowData[9] = value; 
result += ', OK'; 
break;  

default:
result = "unsupported parameter";
}
}
Logger.log(JSON.stringify(rowData));
var newRange = sheet.getRange(newRow, 1, 1, rowData.length);
newRange.setValues([rowData]);
}
return ContentService.createTextOutput(result);
}
function stripQuotes( value ) {
return value.replace(/^["']|['"]$/g, "");
}


เอา Google Sheet ID ใส่ในช่อง

โดยฟังก์ชั่น doGet(e)

จะเพิ่มแถวเข้าไปโดย คอลัมน์แรก

โดยส่งข้อมูลผ่าน rowData []

rowData[0] = วันที่ 

rowData[1] = เวลา 

rowData[2] = pres1 ความดัน MS5837 ตัวที่ 1

rowData[3] = temp1 อุณหภูมิ1

rowData[4] = deep1 ความลึก1

rowData[5] = alti1 ความสูงระดับน้ำทะเล1

rowData[6] = pres2 ความดัน MS5837 ตัวที่ 2

rowData[7] = temp2 อุณหภูมิ2

rowData[8] = deep2 ความลึก2

rowData[9] = alti2 ความสูงระดับน้ำทะเล2

Trick หากทำการแก้ไข code ใดๆ หลังจาก save ควรจะ สร้าง Script ID ใหม่

การทดลองว่า Script ทำงานหรือไม่ ให้ลองวาง code ใน browser


					https://script.google.com/macros/s/XXX Google Script ID XXXX/exec?press1=1000.2&temp1=30&deep1=0.08&alti1=50.2&press2=1000.2&temp2=30&deep2=0.08&alti2=50.3
				
			
ถ้าส่งสำเร็จไม่มีปัญหา Browser จะขึ้น OK, OK, OK, OK, OK

Node-RED my OLD ARMv7l Raspberry PI

sudo apt update
sudo apt upgrade
uname -m เช็คว่า CPU เป็น ARMv7 ขึ้นไปหรือไม่

ติดตั้ง NodeJS และติดตั้ง Node-RED
bash <(curl -sL https://raw.githubusercontent.com/node-red/linux-installers/master/deb/update-nodejs-and-nodered)

ตอบ Y

ตอนนี้จะเข้าได้ทาง http://x.x.x.x:1880
ตั้ง authen
sudo nano /home/XXX/.node-red/settings.js
เอา comment ออก
adminAuth: {
type: “credentials”,
users: [{
username: “admin”,
password: “$2a$08$zZWtXTja0fB1pzD4sHCMyOCMYz2Z6dNbM6tl8sJogENOMcxWV9DN.”,
permissions: “*”
}]
},
แก้ admin ตามที่ชอบ

sudo npm install -g –unsafe-perm node-red-admin
สร้าง hash password
node-red-admin hash-pw
ใส่ password จะได้ hash ไปใส่ใน password: ไฟล์ settings.js

sudo node-red-stop หรือ sudo systemctl stop nodered หยุดการทำงาน Node-RED
sudo node-red-start หรือ sudo systemctl start nodered เริ่มการทำงาน Node-RED อีกครั้ง
sudo node-red-log ดู log
sudo sudo systemctl enable nodered.service to autostart Node-RED at every boot
sudo systemctl disable nodered.service to disable autostart on boot

MQTT Mosquitto Websockets

สมมุติว่า port mqtt คือ 8883 และ websocket คือ 8083

sudo nano  /etc/mosquitto/mosquitto.conf


  GNU nano 5.4                                /etc/mosquitto/mosquitto.conf

# Place your local configuration in /etc/mosquitto/conf.d/

#

# A full description of the configuration file is at

# /usr/share/doc/mosquitto/examples/mosquitto.conf.example

per_listener_settings true

pid_file /run/mosquitto/mosquitto.pid

persistence true

persistence_location /var/lib/mosquitto/

log_dest file /var/log/mosquitto/mosquitto.log

connection_messages true

log_timestamp true

log_timestamp_format %Y-%m-%dT%H:%M:%S

include_dir /etc/mosquitto/conf.d

#allow_anonymous false

listener 8883 0.0.0.0

protocol mqtt

allow_anonymous false

password_file /etc/mosquitto/passwordfile

listener 9001 0.0.0.0

protocol websockets

allow_anonymous false

password_file /etc/mosquitto/passwordfile

#socket_domain ipv4


passwordfile example

aaaa:bbb

encrypt file

sudo mosquitto_passwd -U passwordfile


Share Printer Error 0x00000709 Win 10,11 22H2

SADPTool System Error MSVCR120.dll

SADPTool
System Error
The code execution cannot proceed because MSVCR120.dll was not found. Reinstalling the program may fix this problem
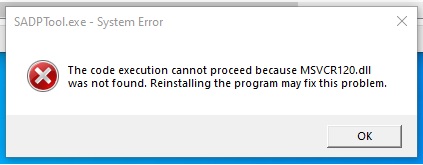
download install

https://download.microsoft.com/download/C/C/2/CC2DF5F8-4454-44B4-802D-5EA68D086676/vcredist_x64.exehttps://download.microsoft.com/download/c/c/2/cc2df5f8-4454-44b4-802d-5ea68d086676/vcredist_x86.exe

win32 only x86.exe

win64 both file

Mikrotik Hotspot Login Logo Change

Mikrotik ตั้งแต่ รุ่น 6.47 ปรับปรุง login hotspot ใหม่ เป็นรูปแบบ SVG

แก้ไข Login.html มองหา

				
					<svg class="logo" data-name="Layer 1" xmlns="http://www.w3.org/2000/svg" viewBox="0 0 174 42">
                        <path fill="#fff" d="M7.32 13.66L0 41.74 3.12 41.74 9.49 15.94 9.58 15.94 15.01 41.74 18.22 41.74 36.86 16.34 36.95 16.34 30.02 41.74 33.18 41.74 40.4 13.66 35.73 13.66 17.23 38.87 11.99 13.66 7.32 13.66zM43.43 21.45L38.19 41.74 41.16 41.74 46.4 21.45 43.43 21.45zM50.68 21.45L45.5 41.74 48.47 41.74 50.36 34.39 55.55 30.77 62.02 41.74 65.27 41.74 57.91 29.28 69.43 21.45 65.46 21.45 51.21 31.36 51.12 31.28 53.66 21.45 50.68 21.45z" />
                        <path d="M71.18 21.45L65.94 41.74h3l2.74-10.62c1-3.81 3.82-7.39 9.16-7.47.56 0 1.13 0 1.7 0l.66-2.48c-.52 0-1.09 0-1.61 0-4.34 0-6.94 2-8.82 5h-.1l1.23-4.68zM103.8 28.8c0-5-4-7.94-9.63-7.94-8.69 0-13.59 6.37-13.59 13 0 5.07 3.44 8.45 9.72 8.45 9 0 13.5-6.68 13.5-13.53m-3 .52c0 4.72-3.44 10.93-9.95 10.93-5 0-7.32-2.68-7.32-6.61 0-4.76 3.59-10.7 10.1-10.7 4.77 0 7.17 2.6 7.17 6.38M132.33 21.43L134.26 13.66 105.19 13.66 103.27 21.45 112.59 21.45 112.59 21.45 122.99 21.45 122.99 21.45 132.33 21.43zM111.67 25.17L107.55 41.74 117.93 41.74 122.06 25.17 122.06 25.16 111.67 25.16 111.67 25.17zM134 25.17l-4.11 16.57h9.35l4.1-16.57zm10.28-3.73l1.94-7.78h-9.34l-2 7.79zM150.09 13.66L143.11 41.74 152.45 41.74 153.91 35.92 156.04 34.34 159.34 41.74 169.49 41.74 163.26 29.55 174.26 21.33 163.07 21.33 156.18 27.3 156.09 27.3 159.44 13.66 150.09 13.66zM47.45 0c1.14 7.93 5.39 12.74 14.07 13.14A10.69 10.69 0 0 1 47.45 0" fill="#fff" fill-rule="evenodd" />
                        <path d="M42.91,1.4c.1,0,.11,0,.12.11A16.55,16.55,0,0,0,48.26,13a16.6,16.6,0,0,0,12,4.66c-10,4-20.55-5.6-17.33-16.28" fill="#fff" fill-rule="evenodd" /></svg>


จากนั้นไปเวป https://editor.method.ac/

https://boxy-svg.com/app

สร้างรูปแก้ไขปรับปรุง แล้วเอามาใส่แทน เช่น

				
					<svg class="logo" data-name="Layer 1" xmlns="http://www.w3.org/2000/svg" viewBox="0 0 744.000000 246.000000" >
 <text transform="matrix(10.5683 0 0 15.5699 -190.632 -2500.72)" stroke="#000" font-weight="bold" xml:space="preserve" text-anchor="start" font-family="'Yrsa'" font-size="NaN" id="svg_8" y="171.85095" x="19.44624" stroke-width="0" fill="#0000ff">EDD EASY</text>
</svg>


add remote user command line

example create USER01

net user USER01 password /add

net localgroup “Remote Desktop Users” USER01 /add

hide user

REG ADD “HKLM\SOFTWARE\Microsoft\Windows NT\CurrentVersion\Winlogon\SpecialAccounts\UserList”

REG ADD “HKLM\SOFTWARE\Microsoft\Windows NT\CurrentVersion\Winlogon\SpecialAccounts\UserList” /v USER01 /t REG_DWORD /d 1


Install DotNet 3.5 Windows 10 with source (no Internet)

เอาไฟล์จาก usb หรือ iso

เอาไฟล์จาก usb หรือ iso ของ windows 10 ใน

\\sources\sxs 

microsoft-windows-netfx3-ondemand-package~31bf3856ad364e35~amd64~~.cab

กับ

Microsoft-Windows-NetFx3-OnDemand-Package~31bf3856ad364e35~amd64~en-US~.cab

ไม่รู้อันไหนก็ copy มาทั้งสองอันใส่ใน d:\sources\sxs

cmd สิทธิ์ admin

Dism /online /enable-feature /featurename:NetFX3 /All /Source:D:\sources\sxs /LimitAccess