ติดตั้ง Teamviewer บน Raspberry PI OS

64 Bit Preview Version https://download.teamviewer.com/download/linux/teamviewer_arm64.deb

32 Bit Preview Version https://download.teamviewer.com/download/linux/teamviewer_armhf.deb

ใช้คำสั่ง wget เช่น download 32 bits

wget https://download.teamviewer.com/download/linux/teamviewer_armhf.deb

sudo dpkg -i teamviewer_armhf.deb หรือ เรียกไฟล์ติดตั้งบน desktop

เชื่อม Wifi บน Raspberry Pi OS โดยไม่มีจอ

สร้างไฟล์ชื่อ wpa_supplicant.conf ไว้ข้างนอก

				
					country=TH # Your 2-digit country code
ctrl_interface=DIR=/var/run/wpa_supplicant GROUP=netdev
update_config=1 
network={
ssid="YOUR_NETWORK_NAME"
psk="YOUR_PASSWORD"
key_mgmt=WPA-PSK
}


กรณีที่มีหลาย SSID 

				
					country=TH # Your 2-digit country code
ctrl_interface=DIR=/var/run/wpa_supplicant GROUP=netdev
update_config=1 

network={
ssid="YOUR_NETWORK_NAME1"
psk="YOUR_PASSWORD1"
key_mgmt=WPA-PSK
id_str="ID_1"
priority=100
}

network={
ssid="YOUR_NETWORK_NAME1"
psk="YOUR_PASSWORD1"
key_mgmt=WPA-PSK
id_str="ID_2"
priority=99
}


เปิด SSH บน Raspberry Pi OS โดยไม่มีจอ

สร้างไฟล์ชื่อ ssh ไม่มีนามสกุลไว้

ใน Windows ไป command prompt สิทธิ์ admin

ไป ที่ Drive flash เช่น H:

copy con ssh. Enter

จากนั้นกด Ctrl-Z

ไฟล์สร้างไว้

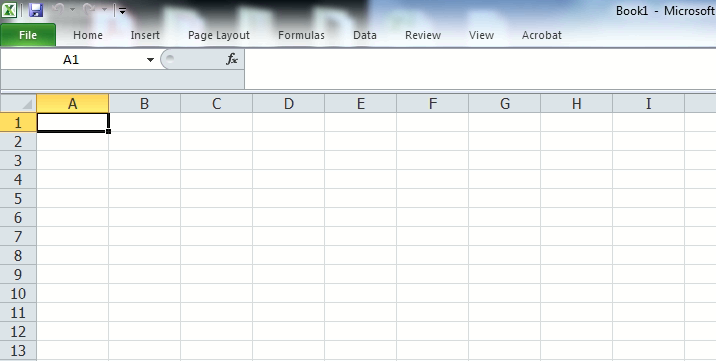
Excel 2010 เมนู ribbon หาย

ให้ กด Ctrl+F1 เรียกว่า Collapse the Ribbon ใน Excel 2019 – 2013 หรือ Minimize the Ribbon ใน Excel 2010 และ 2007

ถ้าไม่หายให้ลองลบ option Excel ใน Registry

Express Auto Backup like VSS

crebkexp.bat

				
					mkdir c:\expresstools
rem mkdir e:\expresstools
cd c:\expresstools
rem cd e:\expresstools

schtasks /create /f /sc ONSTART /tn "Express Backup Daily Autoupdate" /tr "cmd.exe /C \"%~dp0bkexpvssd.bat\" -log" /ru SYSTEM /delay 0000:10
rem schtasks /create /f /sc ONSTART /tn "Express Backup Daily Autoupdate" /tr "cmd.exe /C \"E:\expresstools\bkexpvssd.bat\" -log" /ru SYSTEM /delay 0000:10
schtasks /create /f /sc WEEKLY /d FRI /st 17:05 /tn "Express Backup Weekly Autoupdate" /tr "cmd.exe /C \"%~dp0bkexpvssw.bat\" -log" /ru SYSTEM
rem schtasks /create /f /sc WEEKLY /d FRI /st 17:05 /tn "Express Backup Weekly Autoupdate" /tr "cmd.exe /C \"E:\expresstools\bkexpvssw.bat\" -log" /ru SYSTEM
rem *** remove old SR add add new SR
schtasks /Delete /tn "Microsoft\Windows\SystemRestore\SR" /F
schtasks /Create /XML sr.xml /tn "Microsoft\Windows\SystemRestore\SR"
rem view volume id use volumelist.bat output vollist.txt
rem *** don't forget cahnge volume id at bkexpvssd.bat bkexpvssw.bat ***
mountvol q: \?\Volume{35e857de-6db8-4582-bd58-4b0e531a7d8e}\
md q:\bkexp-d
md q:\bkexp-w
mountvol q: /D


bkexpvssd.bat

				
					rem Volume id use volumelist.bat and put to line 2
mountvol Q: \\?\Volume{FE518032-8B39-46BD-BA8E-E9E74915AA39}\
rem change Express to correct Drive\path
robocopy E:\account\EXPRESSI Q:\bkexp-d\EXPRESSI /xo /s /r:1 /w:1 /nfl /ndl /njh /njs /nc /ns /np
mountvol Q: /D


bkexpvssw.bat

				
					rem Volume id use volumelist.bat and put to line 2
mountvol Q: \\?\Volume{FE518032-8B39-46BD-BA8E-E9E74915AA39}\
rem change Express to correct Drive\path
robocopy E:\account\EXPRESSI Q:\bkexp-w\EXPRESSI /xo /s /r:1 /w:1 /nfl /ndl /njh /njs /nc /ns /np
mountvol Q: /D


					<?xml version="1.0" encoding="UTF-16"?>
<Task version="1.6" xmlns="http://schemas.microsoft.com/windows/2004/02/mit/task">
<RegistrationInfo>
<Source>Microsoft Corporation</Source>
<Author>Microsoft Corporation</Author>
<Description>This task creates regular system protection points.</Description>
<URI>\Microsoft\Windows\SystemRestore\SR</URI>
<SecurityDescriptor>D:(A;;GA;;;SY)(A;;GA;;;BA)(A;;FRFX;;;LS)</SecurityDescriptor>
</RegistrationInfo>
<Triggers>
<BootTrigger>
<Enabled>true</Enabled>
</BootTrigger>
<CalendarTrigger>
<StartBoundary>2021-08-19T17:10:00</StartBoundary>
<Enabled>true</Enabled>
<ScheduleByDay>
<DaysInterval>1</DaysInterval>
</ScheduleByDay>
</CalendarTrigger>
<CalendarTrigger>
<StartBoundary>2021-08-19T12:10:51</StartBoundary>
<Enabled>true</Enabled>
<ScheduleByDay>
<DaysInterval>1</DaysInterval>
</ScheduleByDay>
</CalendarTrigger>
</Triggers>
<Principals>
<Principal id="LocalSystem">
<UserId>S-1-5-18</UserId>
<RunLevel>LeastPrivilege</RunLevel>
</Principal>
</Principals>
<Settings>
<MultipleInstancesPolicy>IgnoreNew</MultipleInstancesPolicy>
<DisallowStartIfOnBatteries>true</DisallowStartIfOnBatteries>
<StopIfGoingOnBatteries>false</StopIfGoingOnBatteries>
<AllowHardTerminate>true</AllowHardTerminate>
<StartWhenAvailable>true</StartWhenAvailable>
<RunOnlyIfNetworkAvailable>false</RunOnlyIfNetworkAvailable>
<IdleSettings>
<Duration>PT10M</Duration>
<WaitTimeout>PT1H</WaitTimeout>
<StopOnIdleEnd>true</StopOnIdleEnd>
<RestartOnIdle>false</RestartOnIdle>
</IdleSettings>
<AllowStartOnDemand>true</AllowStartOnDemand>
<Enabled>true</Enabled>
<Hidden>false</Hidden>
<RunOnlyIfIdle>true</RunOnlyIfIdle>
<DisallowStartOnRemoteAppSession>false</DisallowStartOnRemoteAppSession>
<UseUnifiedSchedulingEngine>true</UseUnifiedSchedulingEngine>
<MaintenanceSettings>
<Period>P3D</Period>
<Deadline>P3DT1M</Deadline>
<Exclusive>true</Exclusive>
</MaintenanceSettings>
<WakeToRun>false</WakeToRun>
<ExecutionTimeLimit>PT72H</ExecutionTimeLimit>
<Priority>7</Priority>
</Settings>
<Actions Context="LocalSystem">
<Exec>
<Command>%windir%\system32\srtasks.exe</Command>
<Arguments>ExecuteScheduledSPPCreation</Arguments>
</Exec>
</Actions>
</Task>


Gnail POP/IMAP Outlook 2010

User Information

  • Your Name: Name of you
  • E-mail Address:Your E-mail

Server Information

  • Account type imap
  • outgoing mail server (SMTP):smip.gmail.com

Logon Information

  • User Name:Your E-mail
  • Password: Your Password

More

Outgoing Server

My outgoing server (SMTP) requires authentication

  • Use same settings as my

Advanced

Server Port Numbers

Incoming server (IMAP) 993

Use the following type of encrypted connection:SSL

Outgoing server (SMTP) 587

Use the following type of encrypted connection:Auto

Server Timeouts :5 minuted

Outlook 2013 2016 2019 Search e-mail no results

Outlook 2013 2016 2019 link search Windows Search

  • Check Windows Serach Service run automatic
  • at Logon allow service to interact with desktop
  • rebuild index File -> Options -> Search
  • Index Options
  • Index option diaglog find Microsoft Outlook
  • ถ้ามี เลือก Advanced เลือก Rebuild
  • ถ้าไม่เจอ ให้ ทำดังนี้
  • windows 10 , 11 ให้ไปที่

Update & Security เลือก Troubleshoot
เลือก Addtional troubleshooters
เลื่อนมาหา(รูปแว่นขยาย) Search and Indexing กด Run the troubleshooters
ที่หัวข้อ What problems do you notice?
เลือก Outlook search doesn’t return results เดี๊ยวระบบจะแจ้งเอง

อีกทางหนึ่ง ไปที่ file pst คลิ๊กขวา properties เลือก Advanced

เลือก allow this file have contents indexed in addtion to file properties

Outlook เพื่อป้องกันการเข้าถึง pst จากไดรฟ์เครือข่าย เนื่องจากไฟล์ pst เสียหายง่ายกว่า

ใช้การค้นหาแบบดั้งเดิมของ Outlook ก็ทำงานได้เช่นกัน แต่จะช้ากว่ามาก ตั้งค่ารีจิสตรีคีย์นี้เพื่อปิดใช้งานการค้นหาทันที (Instant Search)

HKEY_LOCAL_MACHINE\SOFTWARE\Policies\Microsoft\Windows\Windows Search

DWORD: PreventIndexingOutlook
Value: 1

ถ้าหาไม่เจอลองหา และใส่ใน

HKEY_LOCAL_MACHINE\SOFTWARE\Microsoft\Office\ClickToRun\REGISTRY\MACHINE\Software\Microsoft\Windows\Windows Search
HKEY_LOCAL_MACHINE\SOFTWARE\Microsoft\Office\ClickToRun\REGISTRY\MACHINE\Software\Microsoft\Windows Search
HKEY_LOCAL_MACHINE\SOFTWARE\Microsoft\Windows\Windows Search
HKEY_LOCAL_MACHINE\SOFTWARE\Microsoft\Windows Search

ESET Windows 7 Service pack KB

Install Eset on Windows 7 Service Pack 1 user patch

KB4474419

for x86 http://download.windowsupdate.com/c/msdownload/update/software/secu/2019/09/windows6.1-kb4474419-v3-x86_0f687d50402790f340087c576886501b3223bec6.msu

for x64

http://download.windowsupdate.com/c/msdownload/update/software/secu/2019/09/windows6.1-kb4474419-v3-x64_b5614c6cea5cb4e198717789633dca16308ef79c.msu

and  KB4490628

for x86

http://download.windowsupdate.com/c/msdownload/update/software/secu/2019/03/windows6.1-kb4490628-x86_3cdb3df55b9cd7ef7fcb24fc4e237ea287ad0992.msu

for x64

http://download.windowsupdate.com/c/msdownload/update/software/secu/2019/03/windows6.1-kb4490628-x64_d3de52d6987f7c8bdc2c015dca69eac96047c76e.msu

JHCIS label printer print problem

  1. Download Driver ล่าสุด https://www.seagullscientific.com/support/downloads/drivers/zebra/
  2. แก้ permission jhcis-client jhcis user full
  3. แก้ไฟล์ print.properties มองหา drug_label1
  4. ตัวอย่าง พิมพ์ผ่าน lan ไปยัง zebra gt800 เครื่อง nmd05
  5. drug_label1=\\\\nmd05\\Zebra GT800 (203 dpi) – EPL